Getting started with the FORMAS.AI SketchUp extension
Render a SketchUp view without leaving SketchUp. Explore lighting, materials and visual directions from your current view. Your original model remains unchanged.

SketchUp extension demo · 1 min 25 sec
Before you start
Use SketchUp desktop 2024 or newer and your existing FORMAS account. The extension is free to install.
Install FORMAS.AI from SketchUp Extension Warehouse. Download the extension, then open Extension Manager in SketchUp to complete the installation.
Installation links and supported platforms
Free 1K preview demo · 31 sec
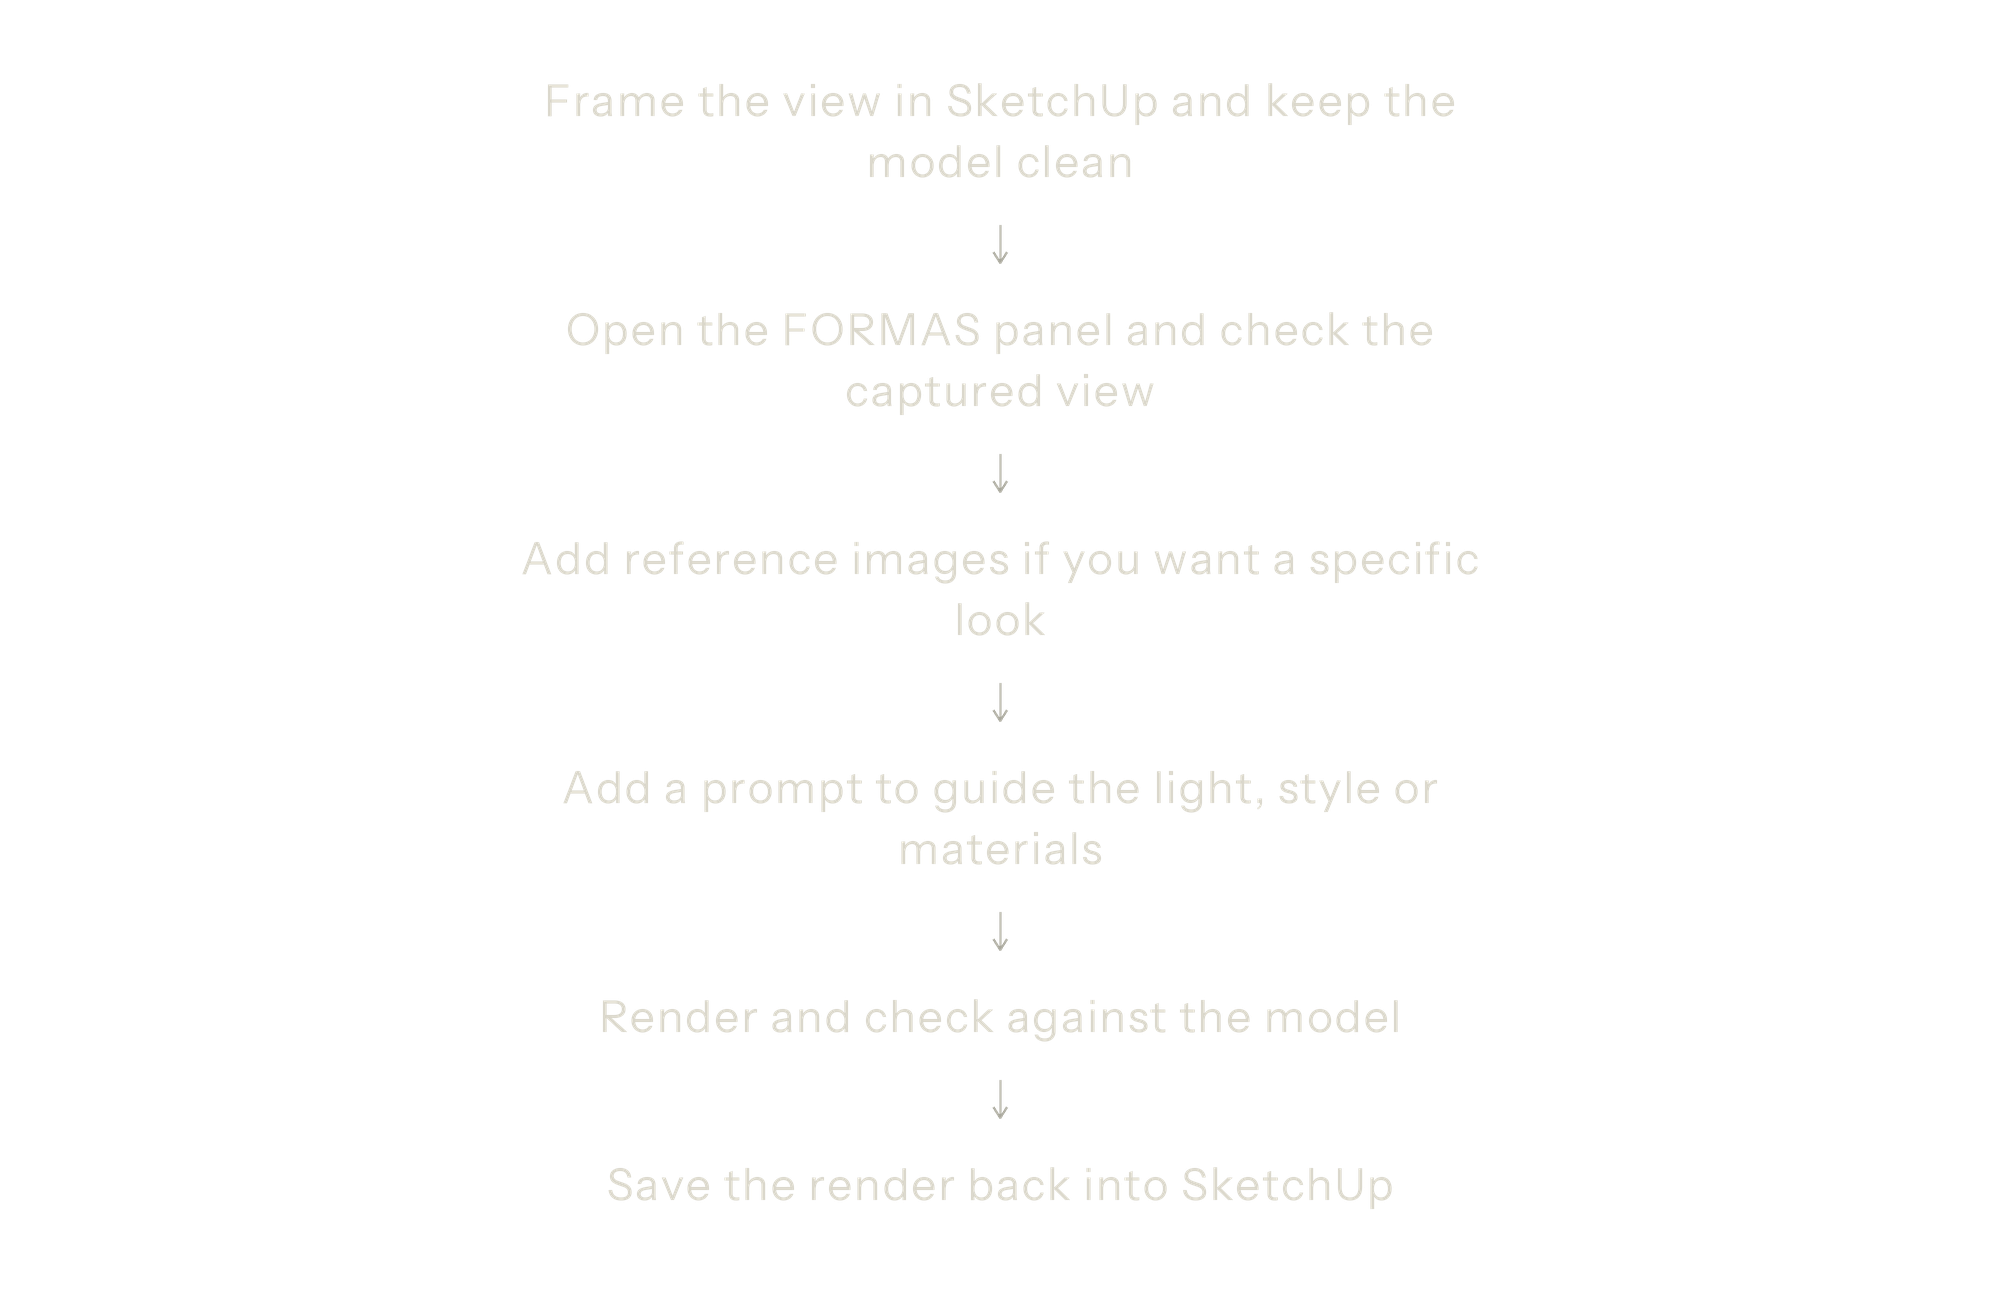
01 — Prepare your SketchUp view
Set the camera where you want the render. Frame the space so the walls, openings, furniture and main materials are visible.
Keep the model as clean as possible. The app reads everything in your view: geometry, materials, shadows and any lighting effects.
- Use simple, clean materials. Avoid photo textures with lighting, shadows or reflections painted into them. Models downloaded from 3D Warehouse often have these, and they are the most common reason a result looks CG
- Turn off SketchUp shadows, fog and heavy edge styles. Let the prompt add the light
- Hide guides, section planes and tags that are not part of the design
- Maximise the modelling window. The capture uses what is on screen, so a larger view gives a sharper source
You do not need a white model. Clean materials help the app understand your finishes.
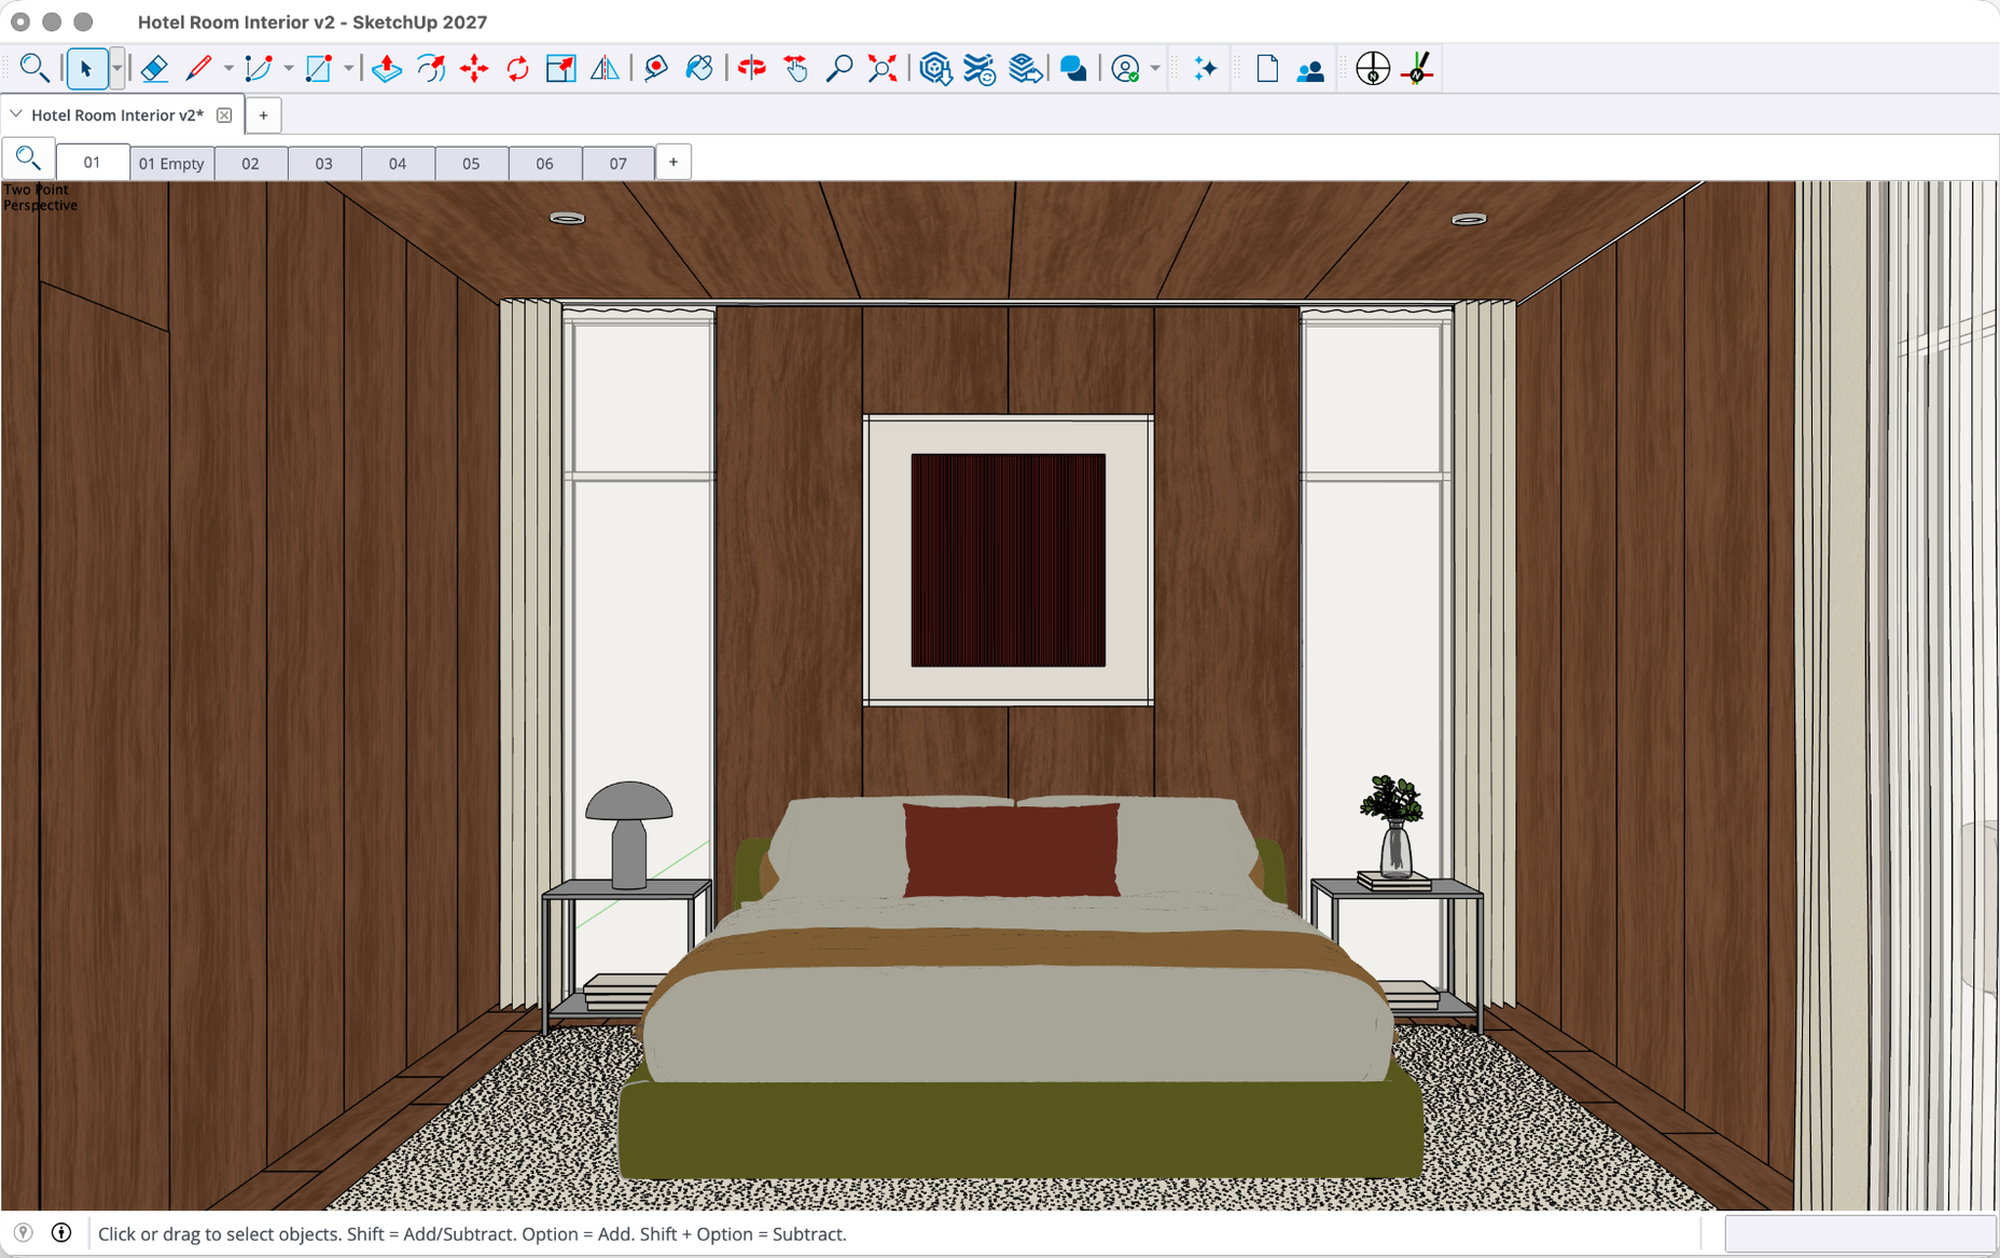
02 — Capture the view with FORMAS for SketchUp
Open the FORMAS panel from the Extensions menu. The Screenshot 3D to Render tab opens with your current view already captured. For 2K, 4K or 8K output, sign in with your existing FORMAS account or create one; see the free-preview tip above if you are trying it for the first time.
Moved the camera? Click Recapture. When the view looks right, click Render this view.
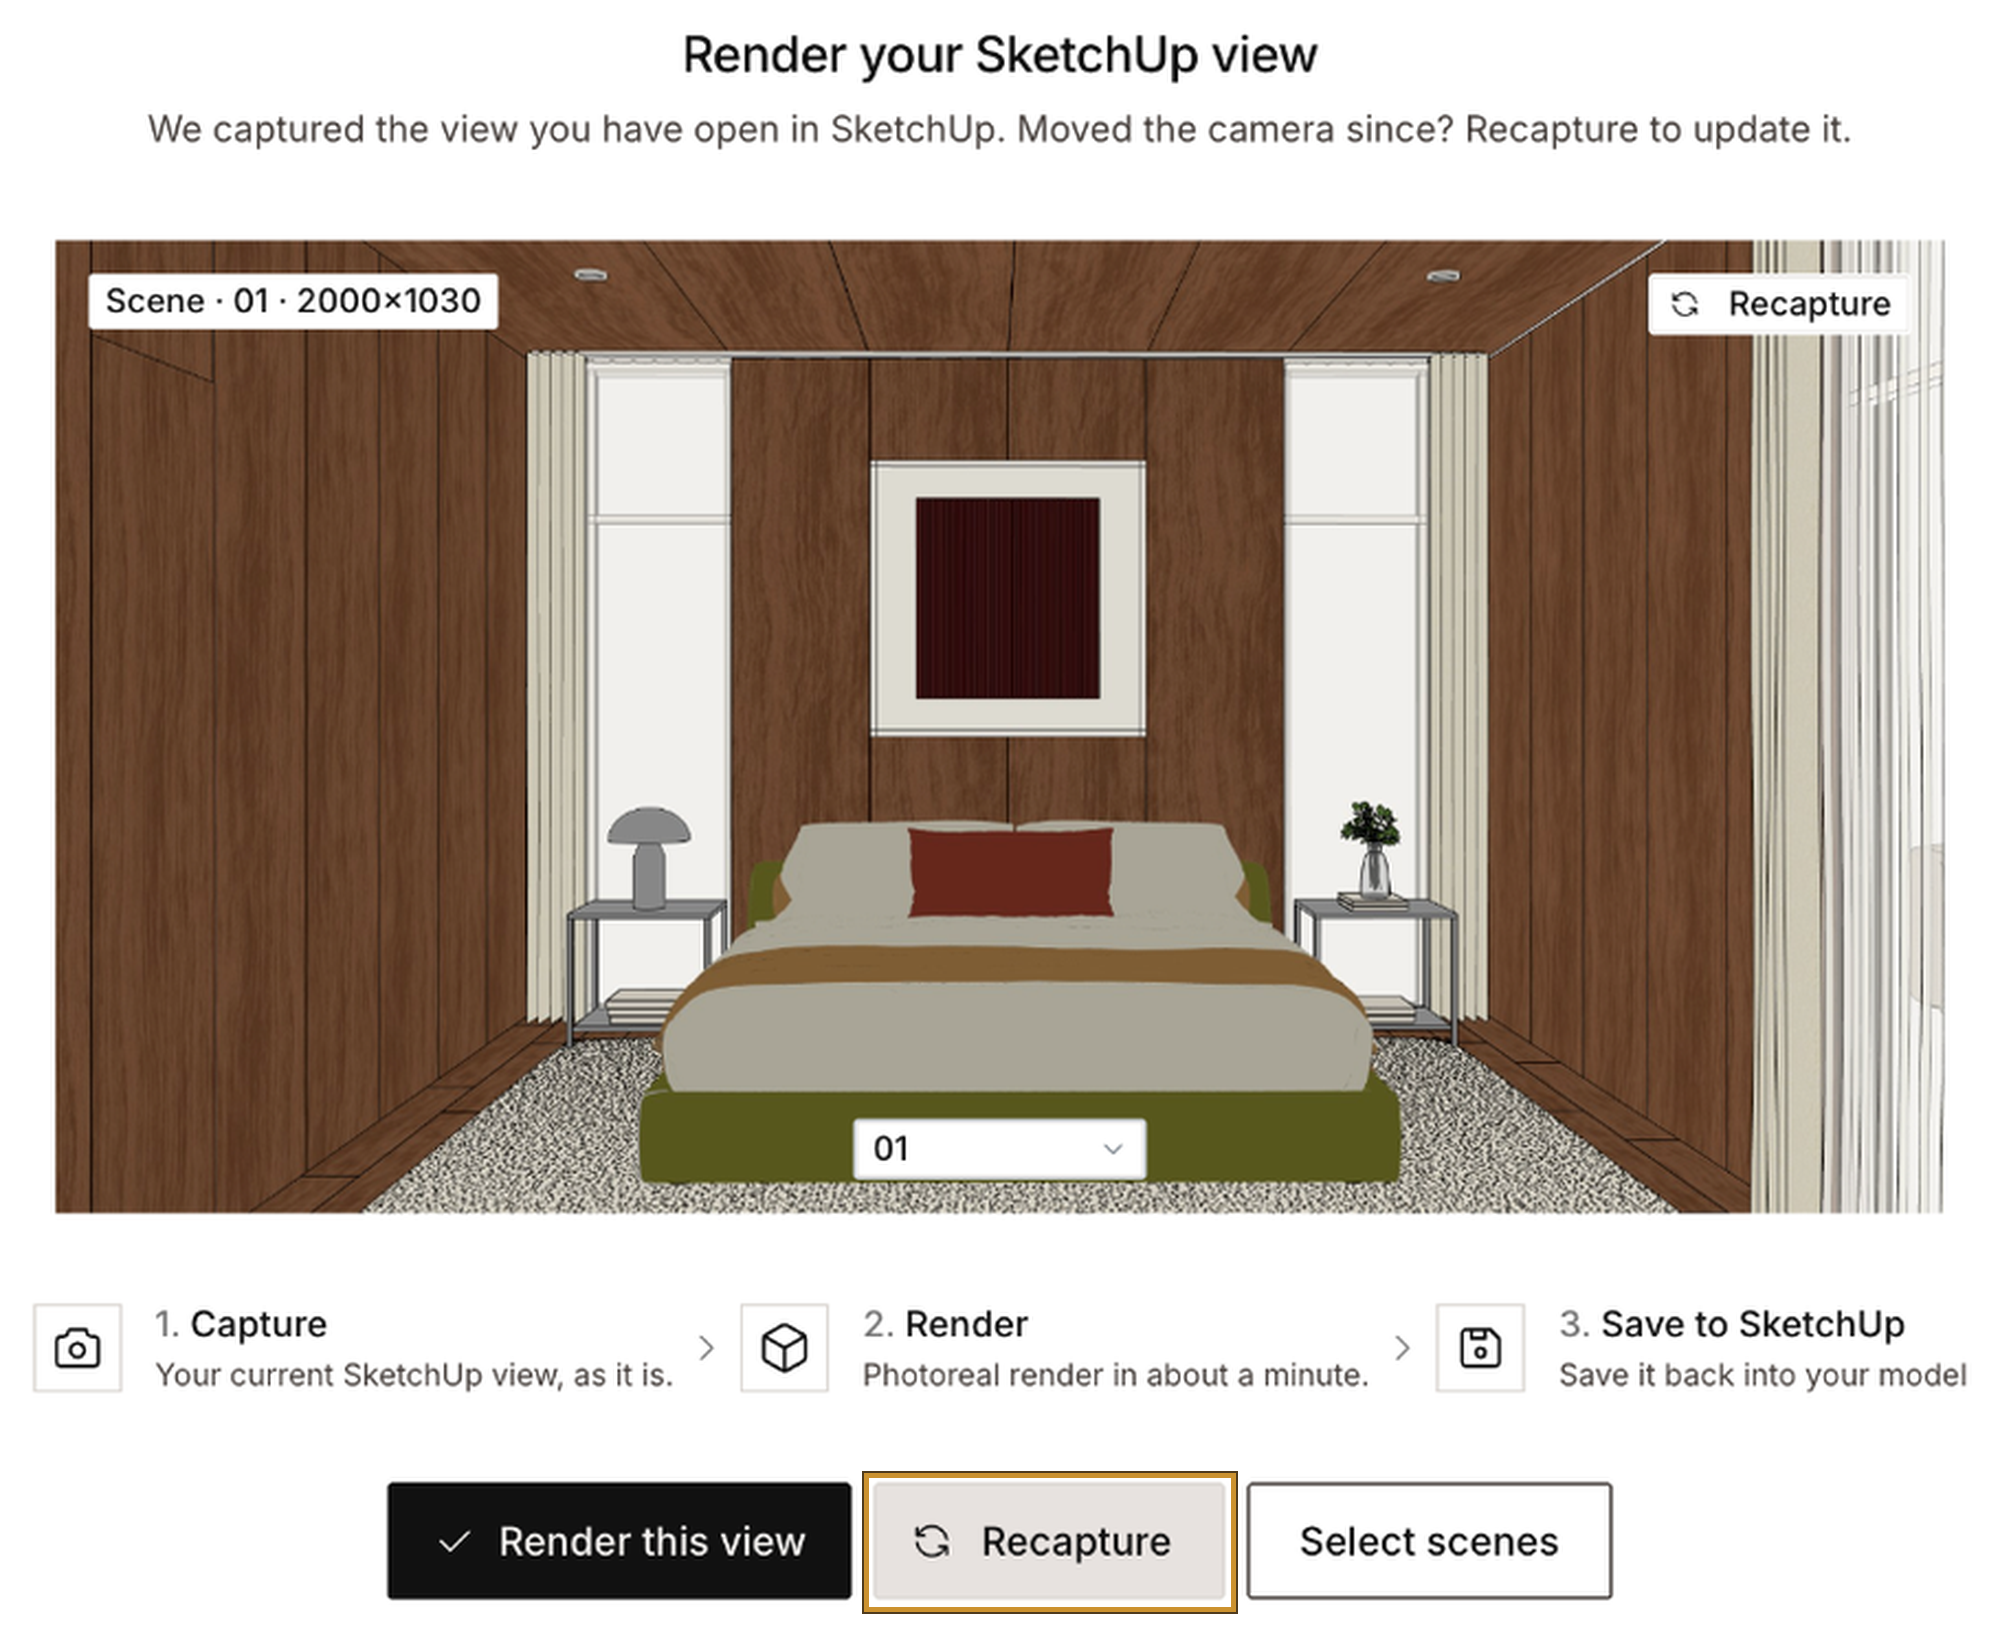
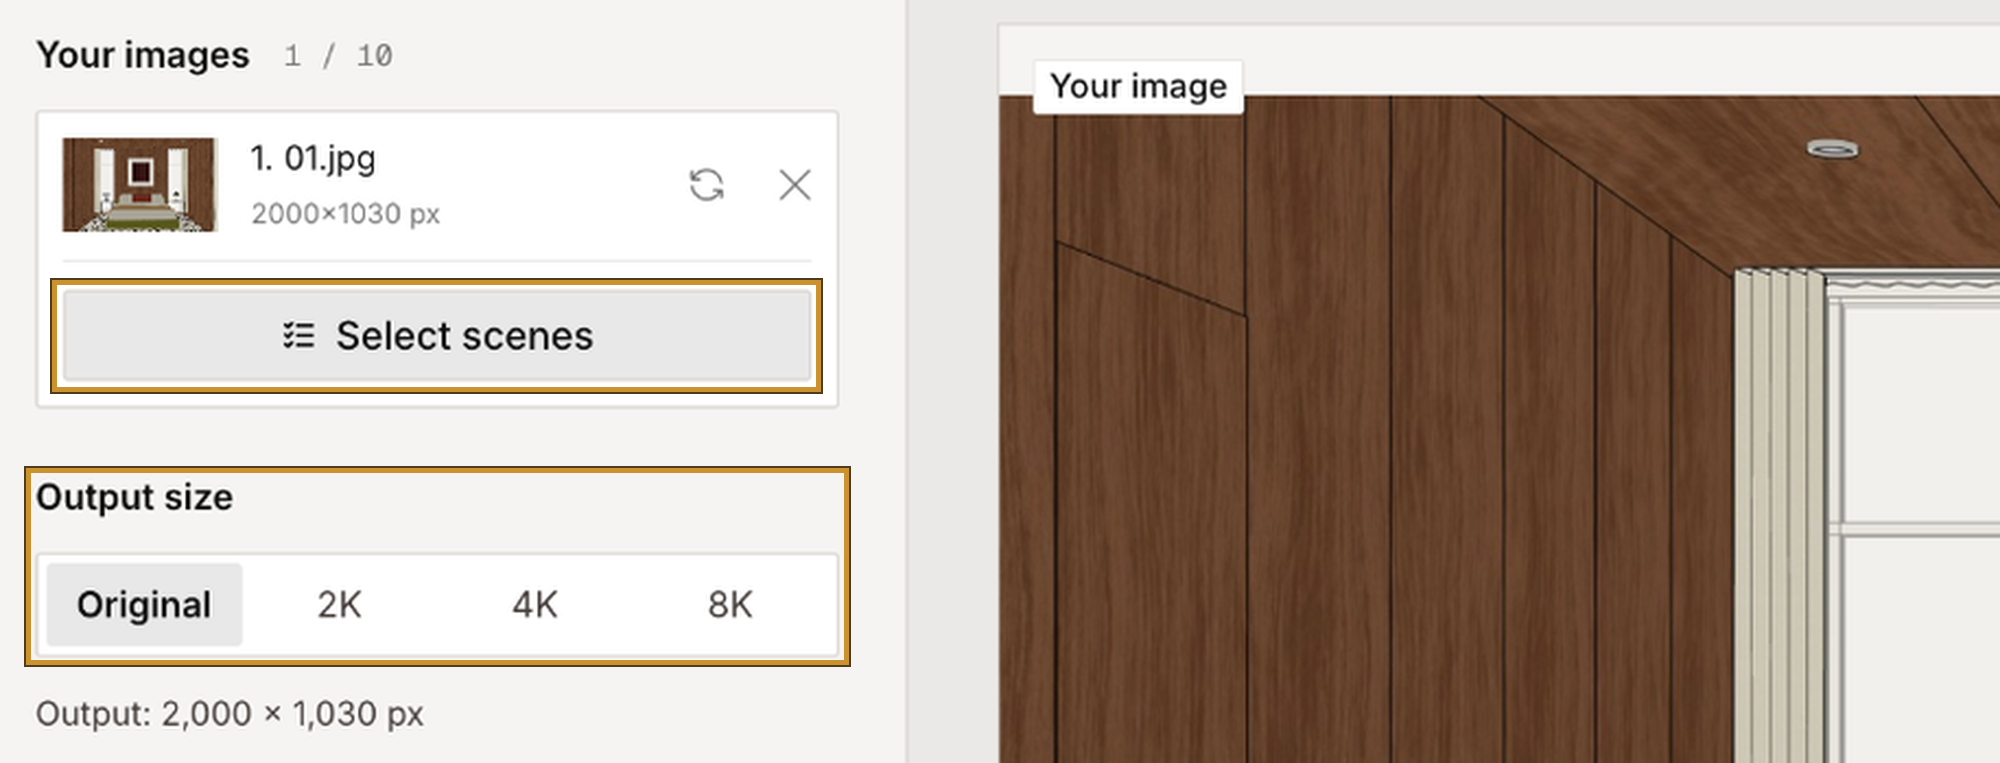
To render several views at once, click Select scenes and choose the saved scenes you want. You can add up to 10 images, and FORMAS renders them all in one go. Under Output size, choose Original, 2K, 4K or 8K.
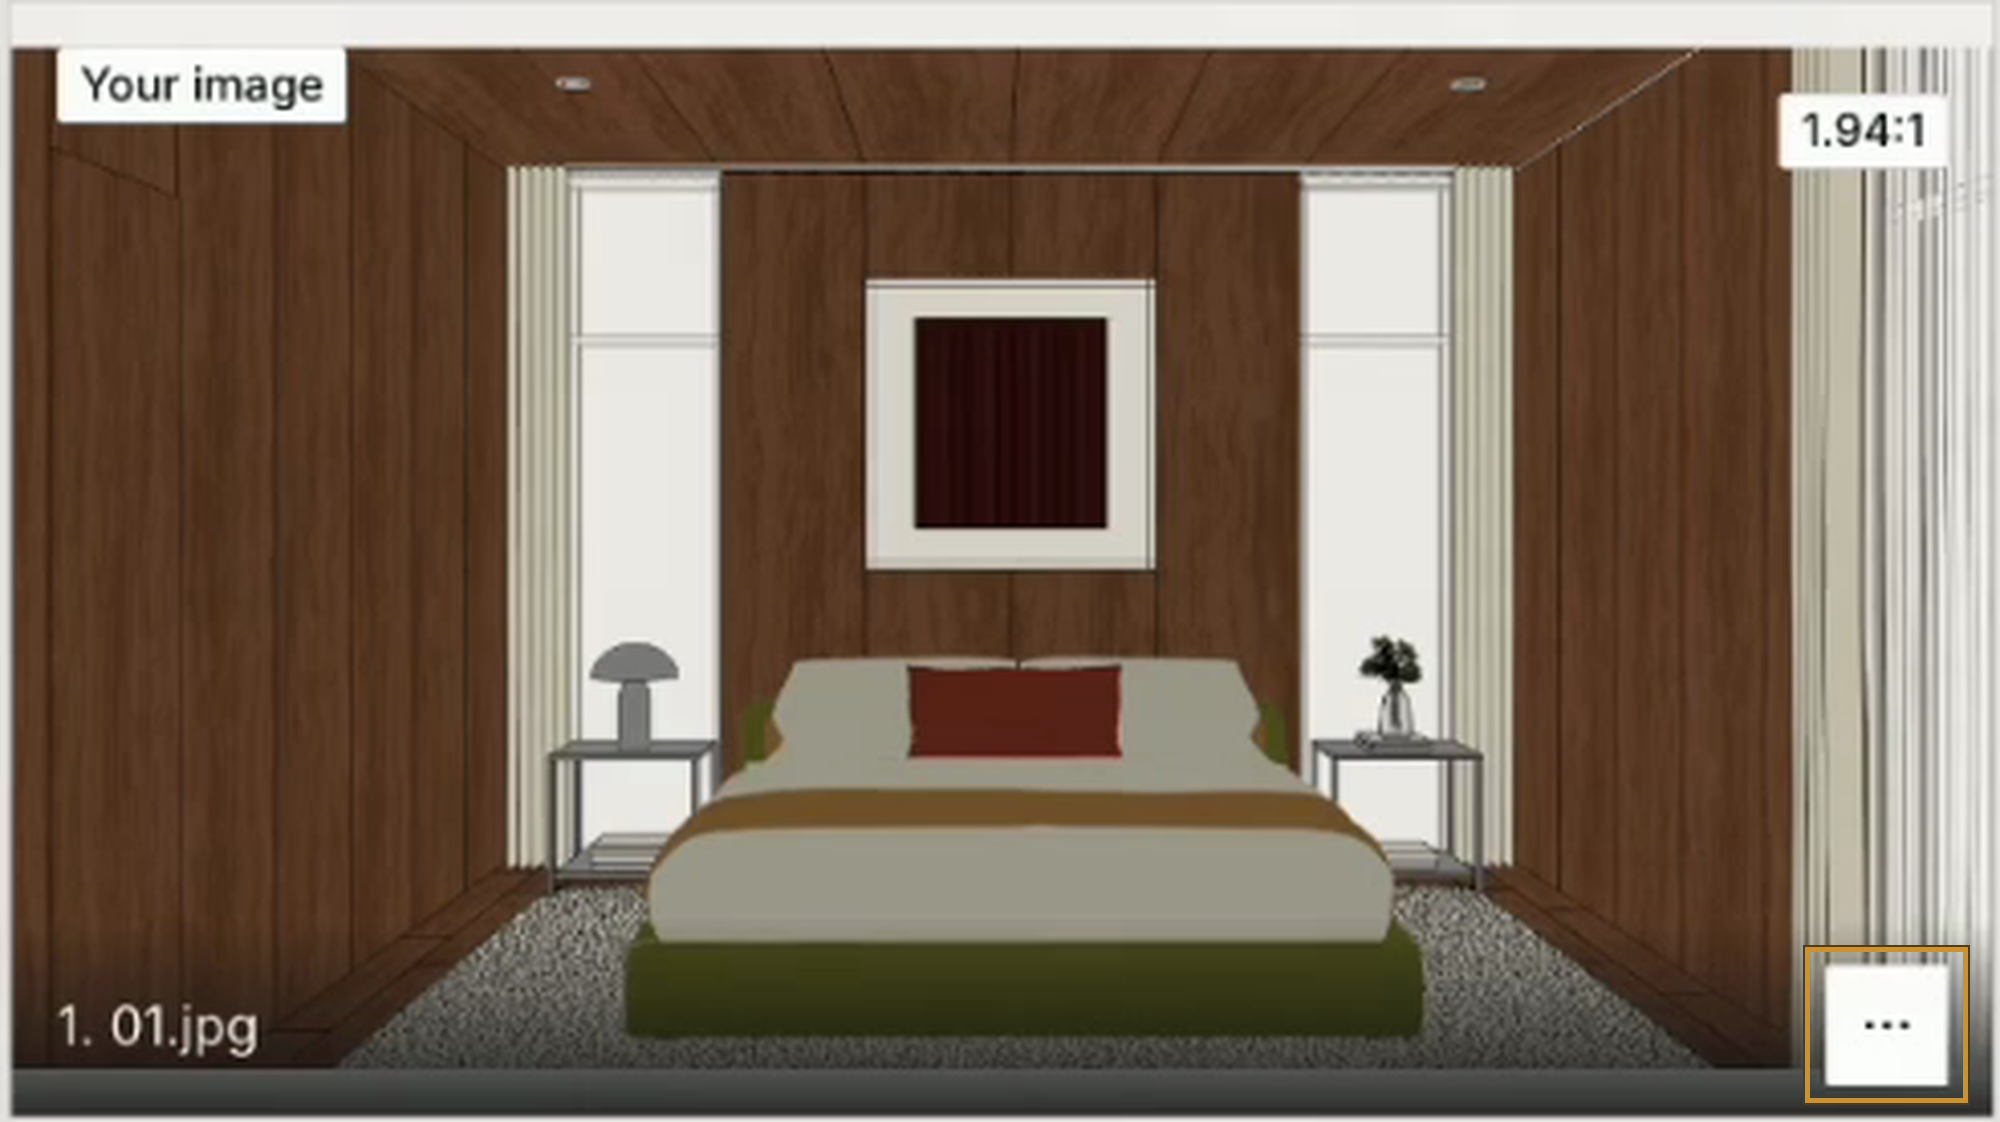
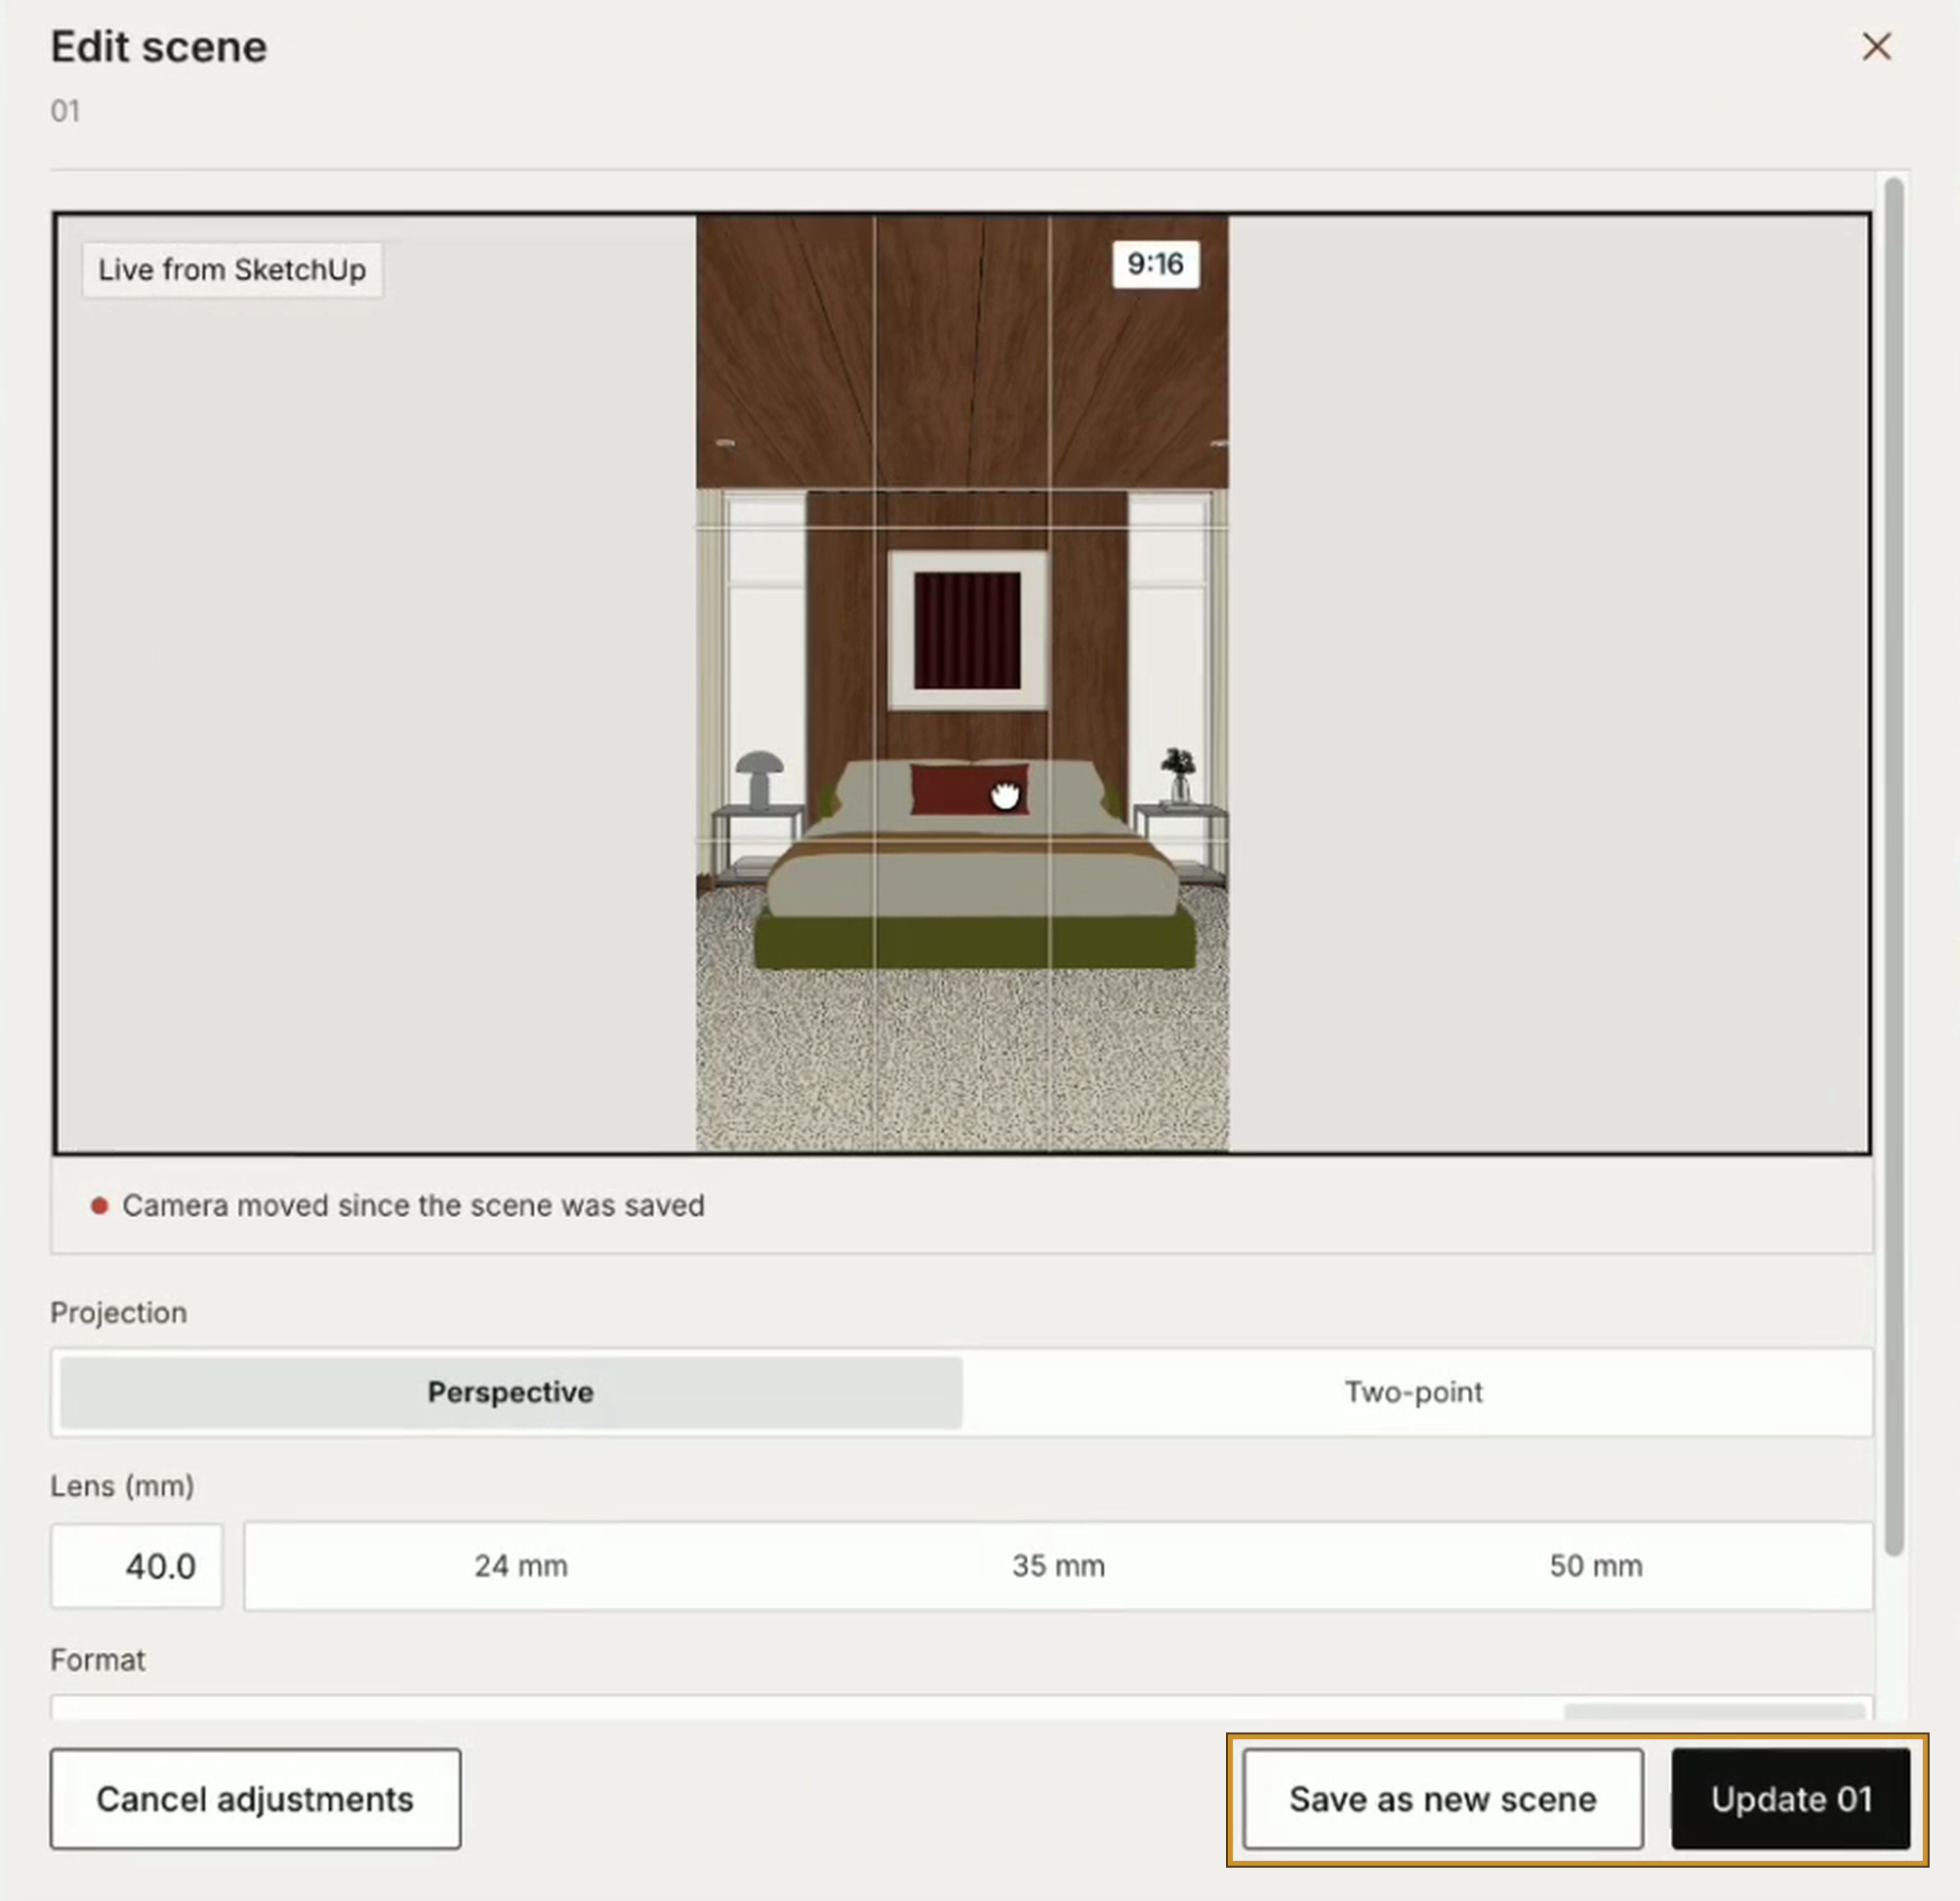
To adjust the framing without returning to SketchUp, open the … menu at the bottom-right of a captured preview and choose Edit scene.
Adjust the lens, image format or framing, then choose Update [scene name] to update the current scene, or Save as new scene to add a new scene to your SketchUp model and keep the original one unchanged.
03 — Show the look with reference images (optional)
Render with references demo · 1 min 1 sec
Each input has its own job:
- Your images define the design: camera, proportions and where everything sits
- Reference images show a look that is hard to describe in words
- Instructions tell FORMAS how you want the design to look (step 04)
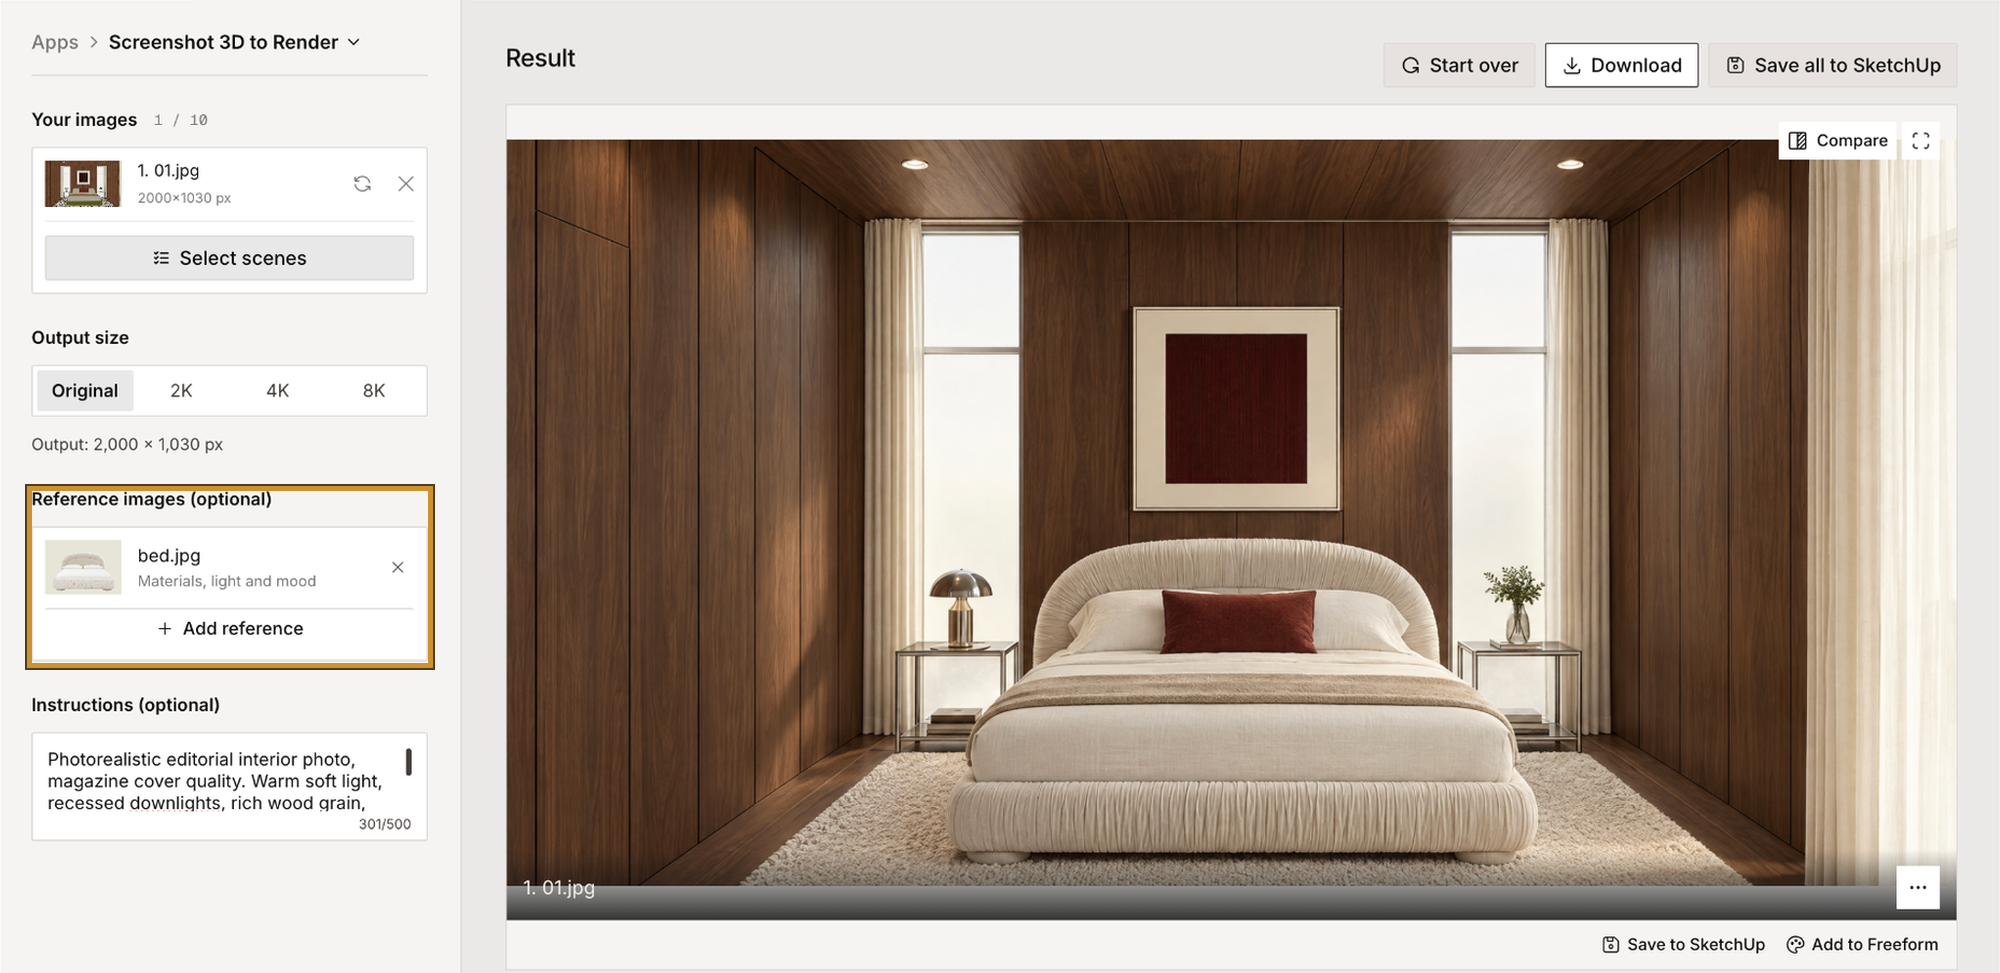
A reference shows what words can't describe precisely: the grain of a wood, the tone of a stone, the softness of the light. It also works for objects. Add a photo of a bed, and FORMAS will usually swap it in for the bed in your scene.
A photo contains a lot at once, so in the next step, use the instructions to say what to take from it and where it goes.
04 — Describe how you want it to look (optional)
You can render with no instructions at all. By default, FORMAS aims for a photorealistic image based on the architecture, openings and furniture in your captured view. Check the generated details against the original.
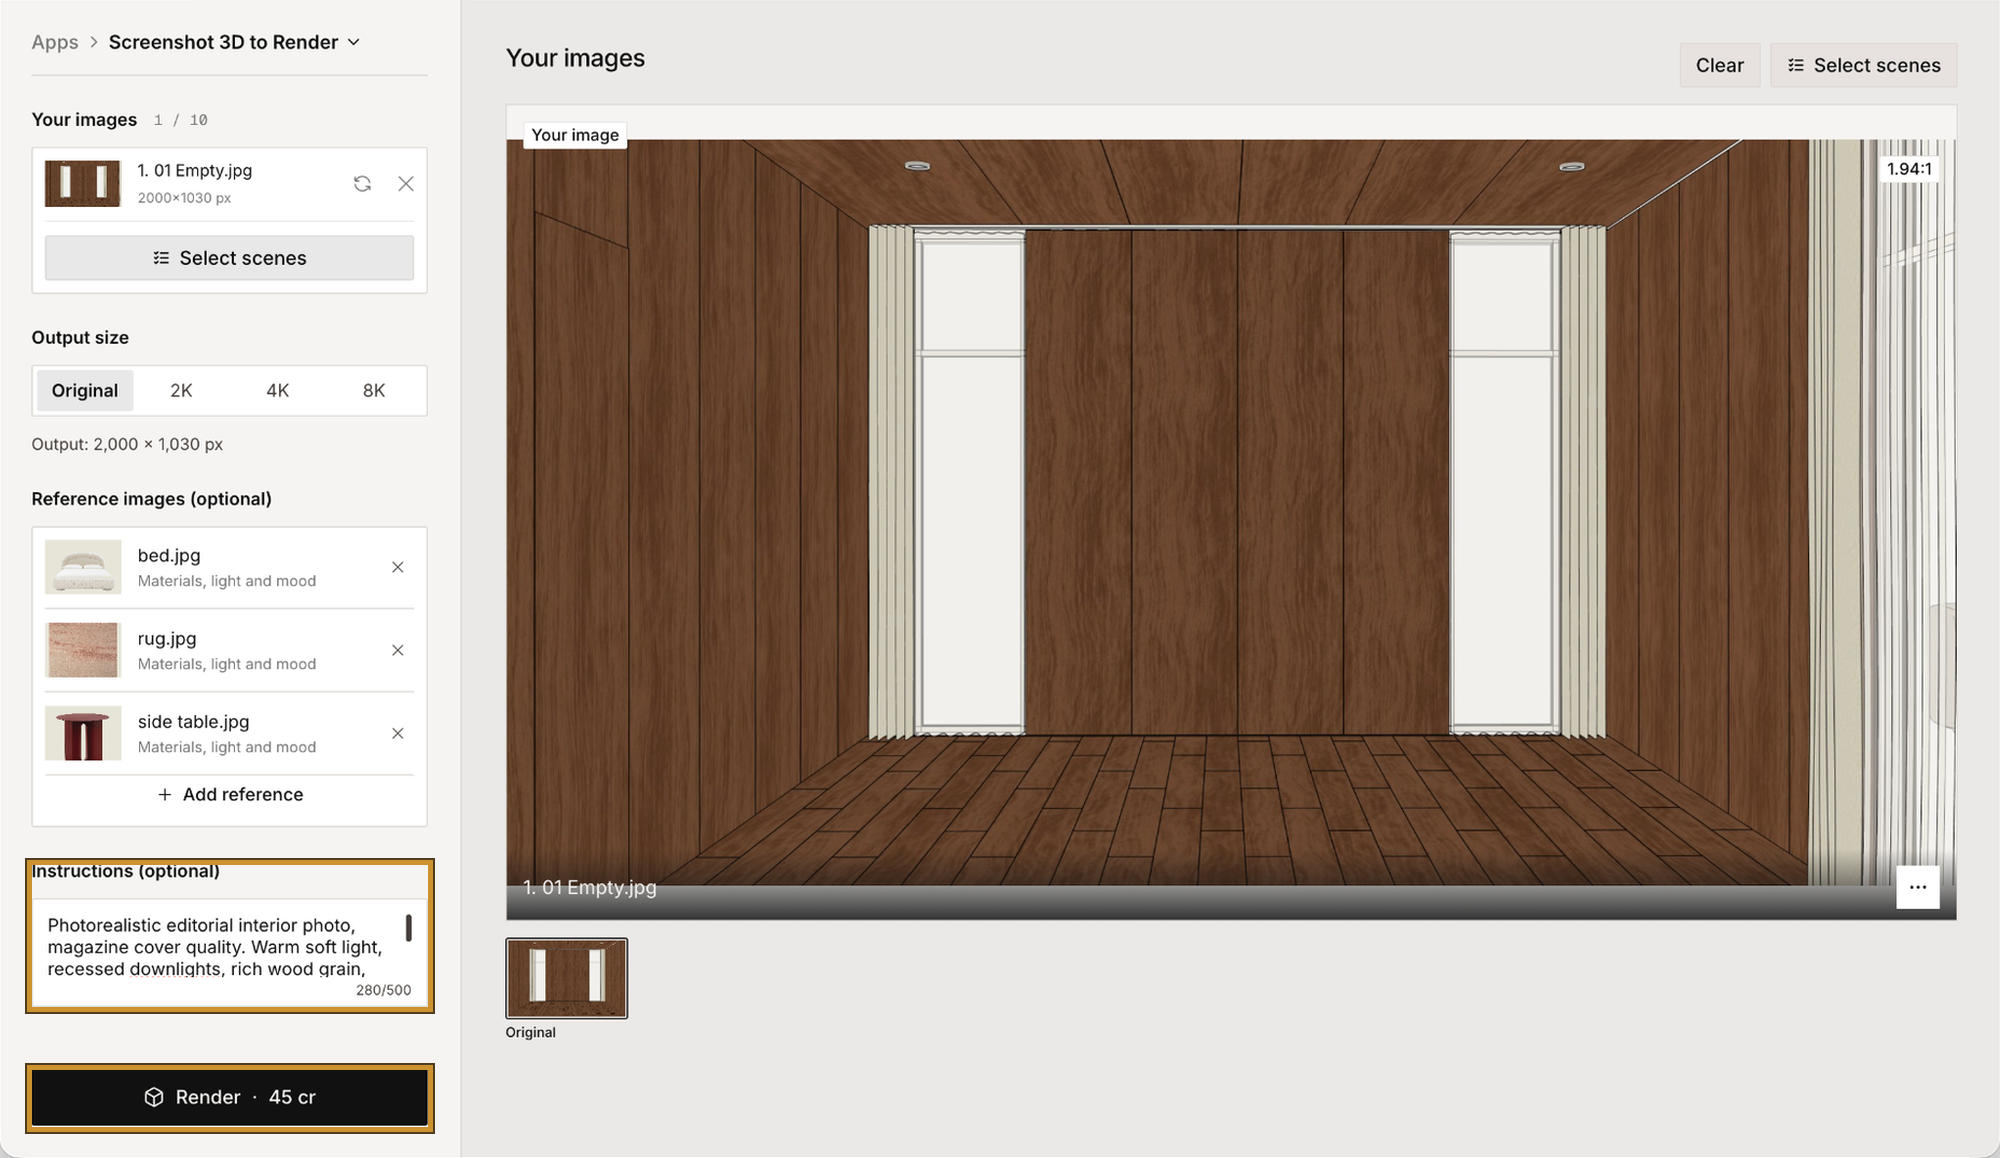
Add instructions when you want to guide the result, for example the light, the photo style or a material:
If you added references, say how to use them:
Furnish an empty room. Add photos of the furniture you want as references, and ask for it in the instructions. FORMAS places each piece in the room for you:
Requests that change the architecture, like adding a window, may not come out consistently. For those, edit the model in SketchUp and capture it again.
05 — Generate and check the result
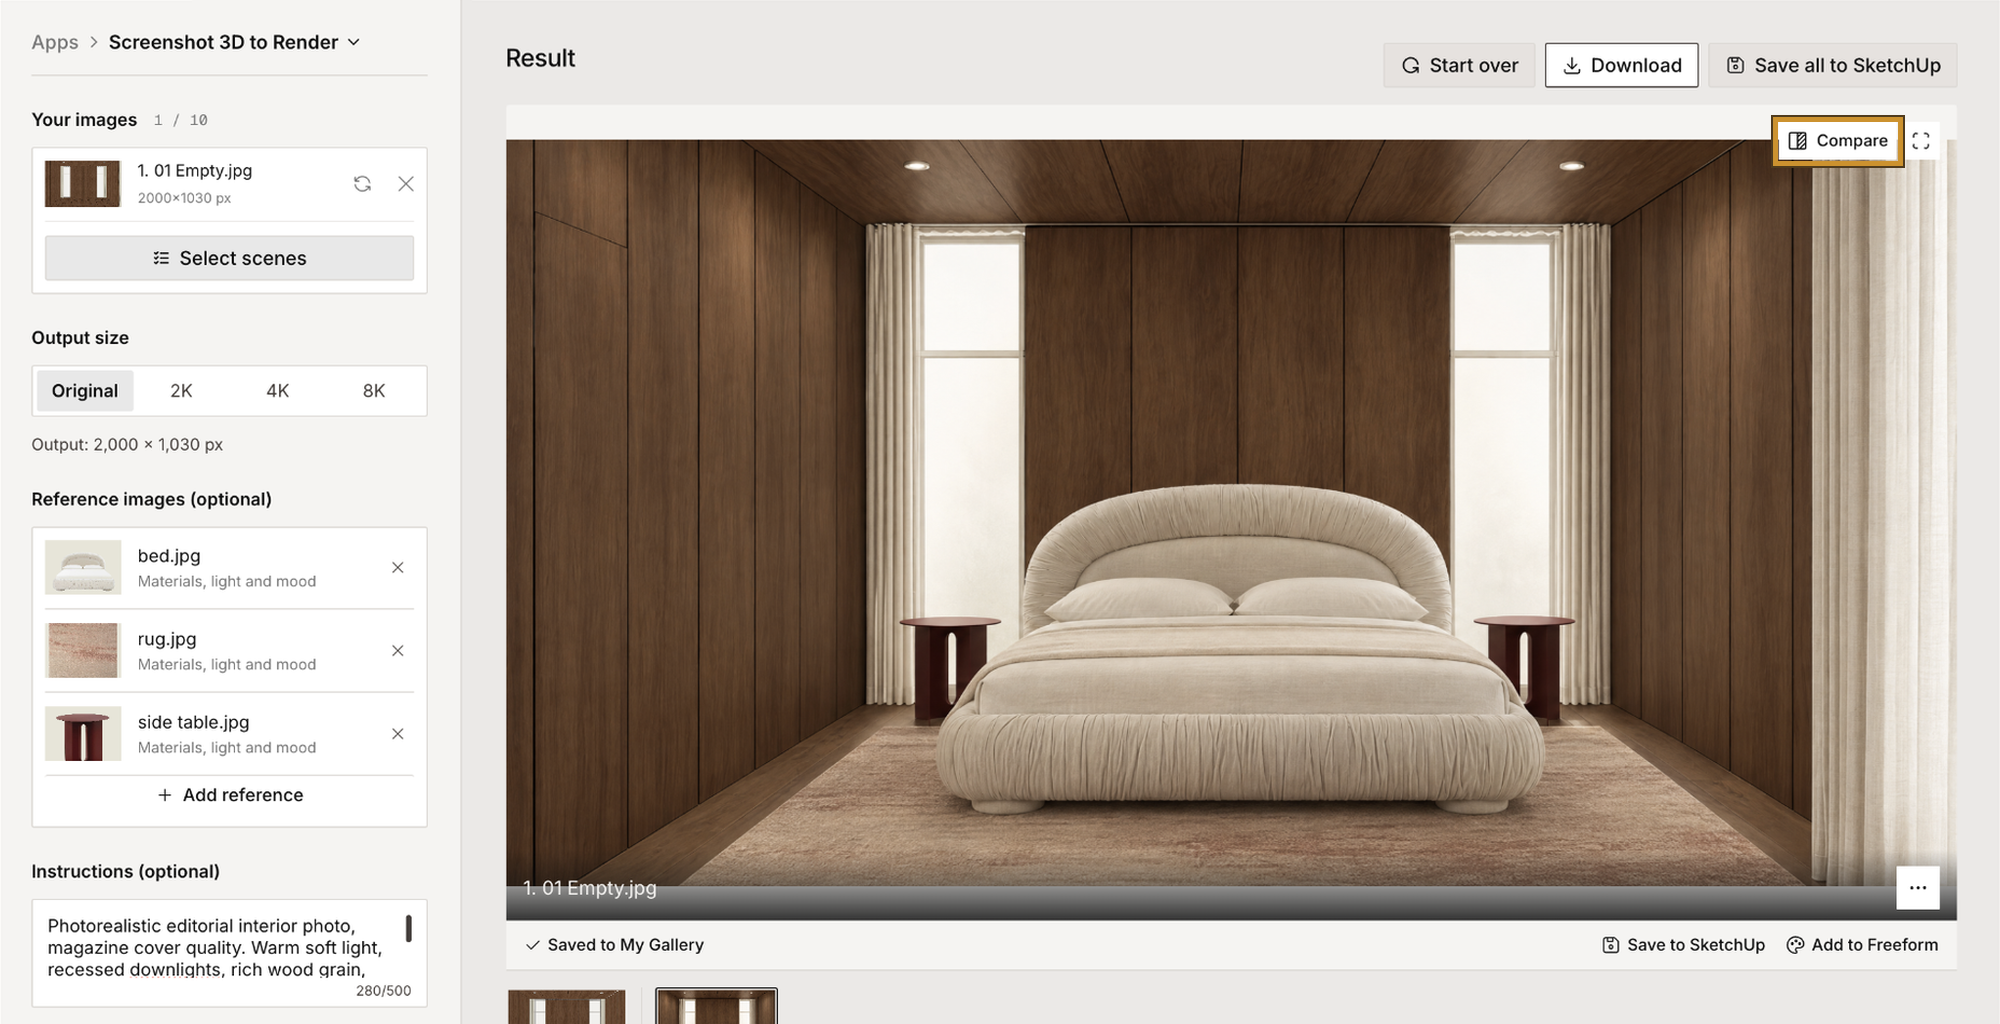
Click Render. The render appears in the panel in about a minute.
Click Compare to check the render against the captured view. Check the openings, furniture positions and proportions before sharing. Generating an image does not change the geometry in your SketchUp model.
If the light is not what you wanted, change only the light part of the prompt and generate again. Keep the photo style the same so you can compare results.
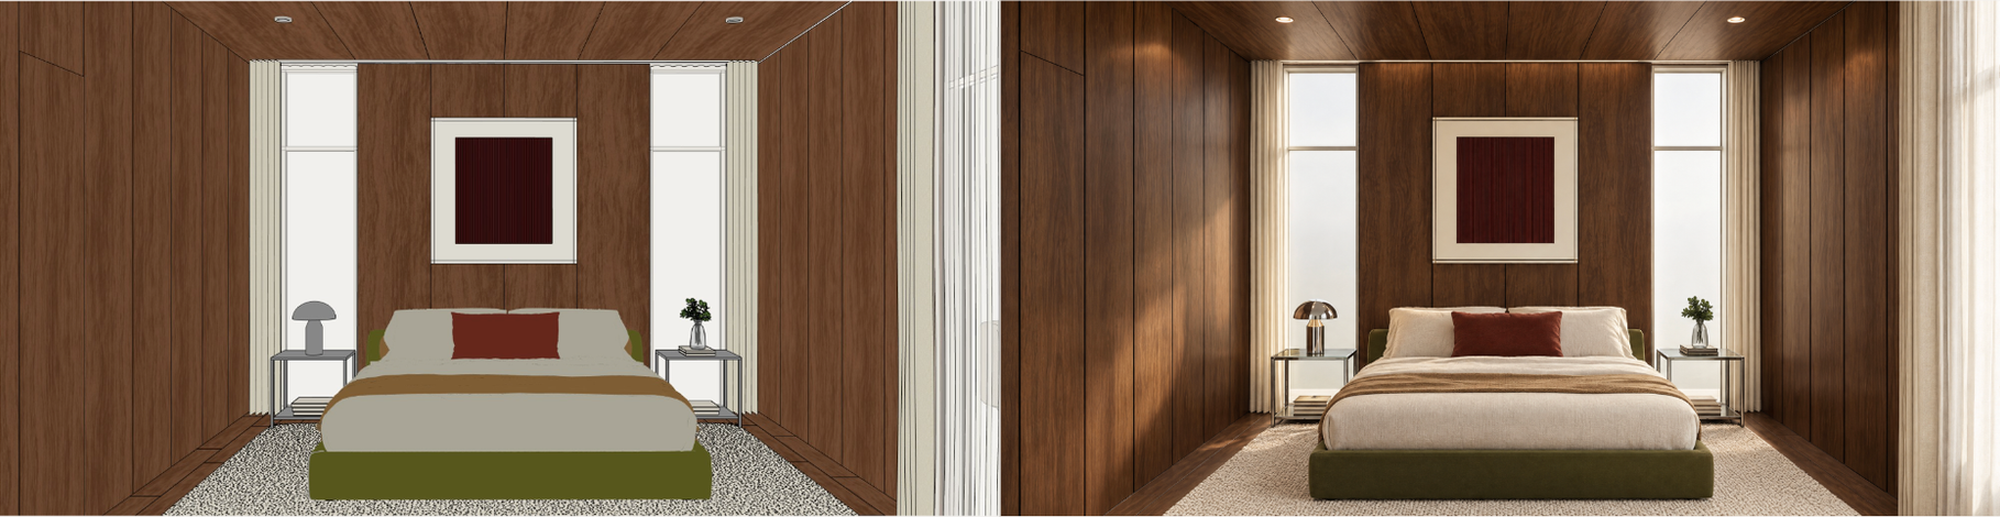
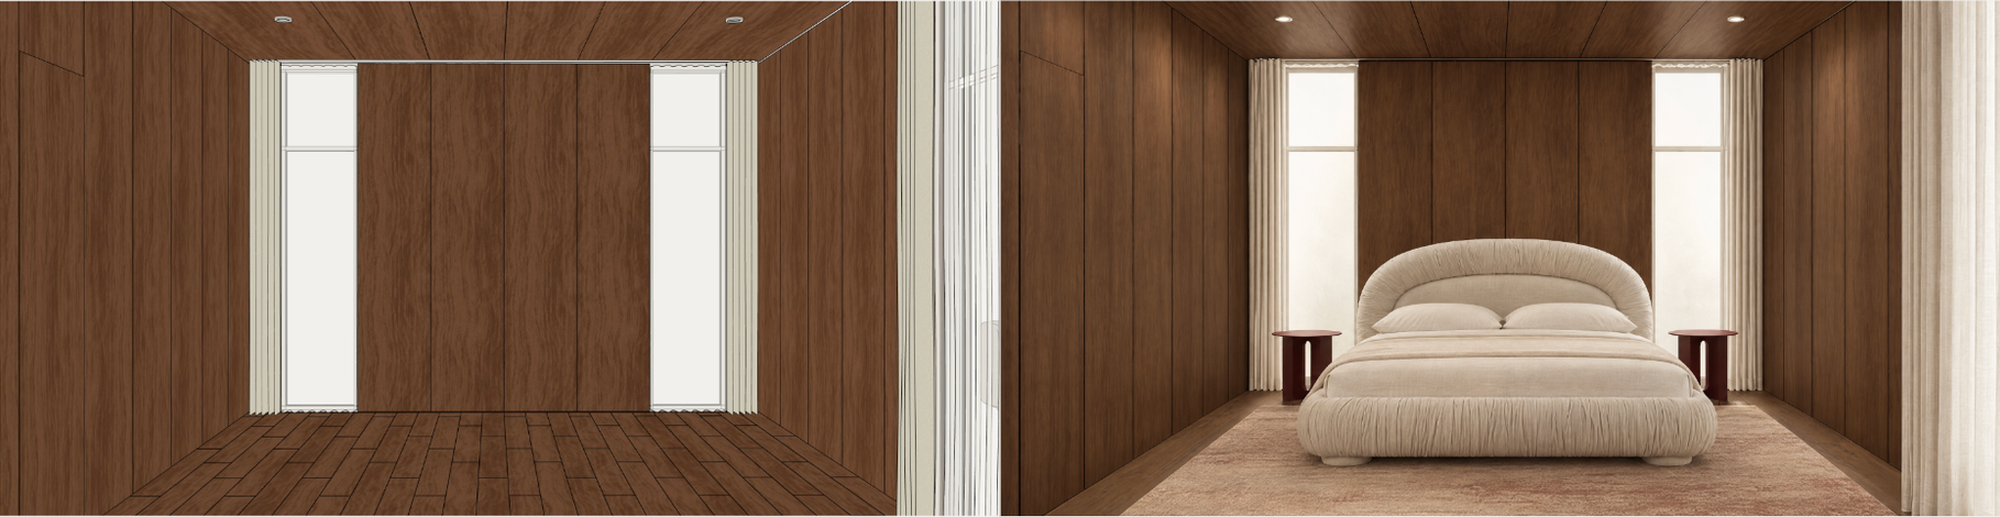
06 — Bring the render back into SketchUp
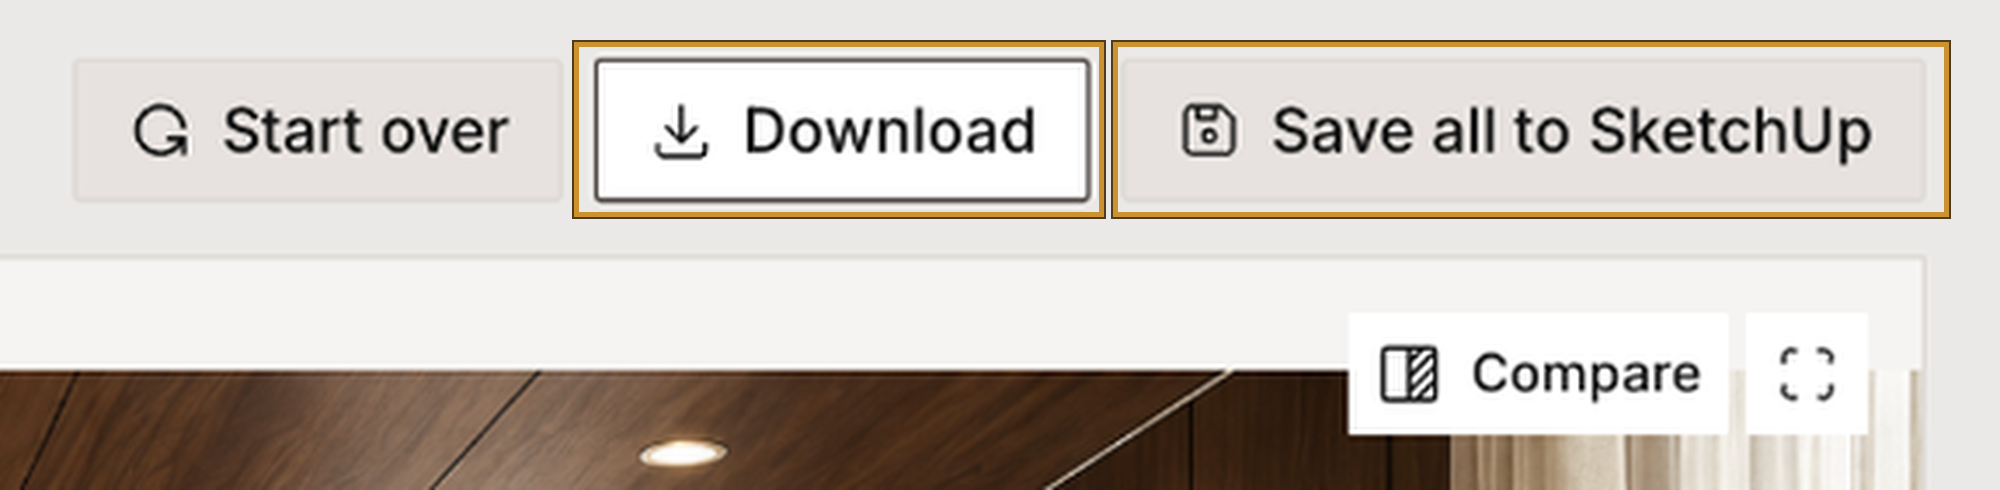
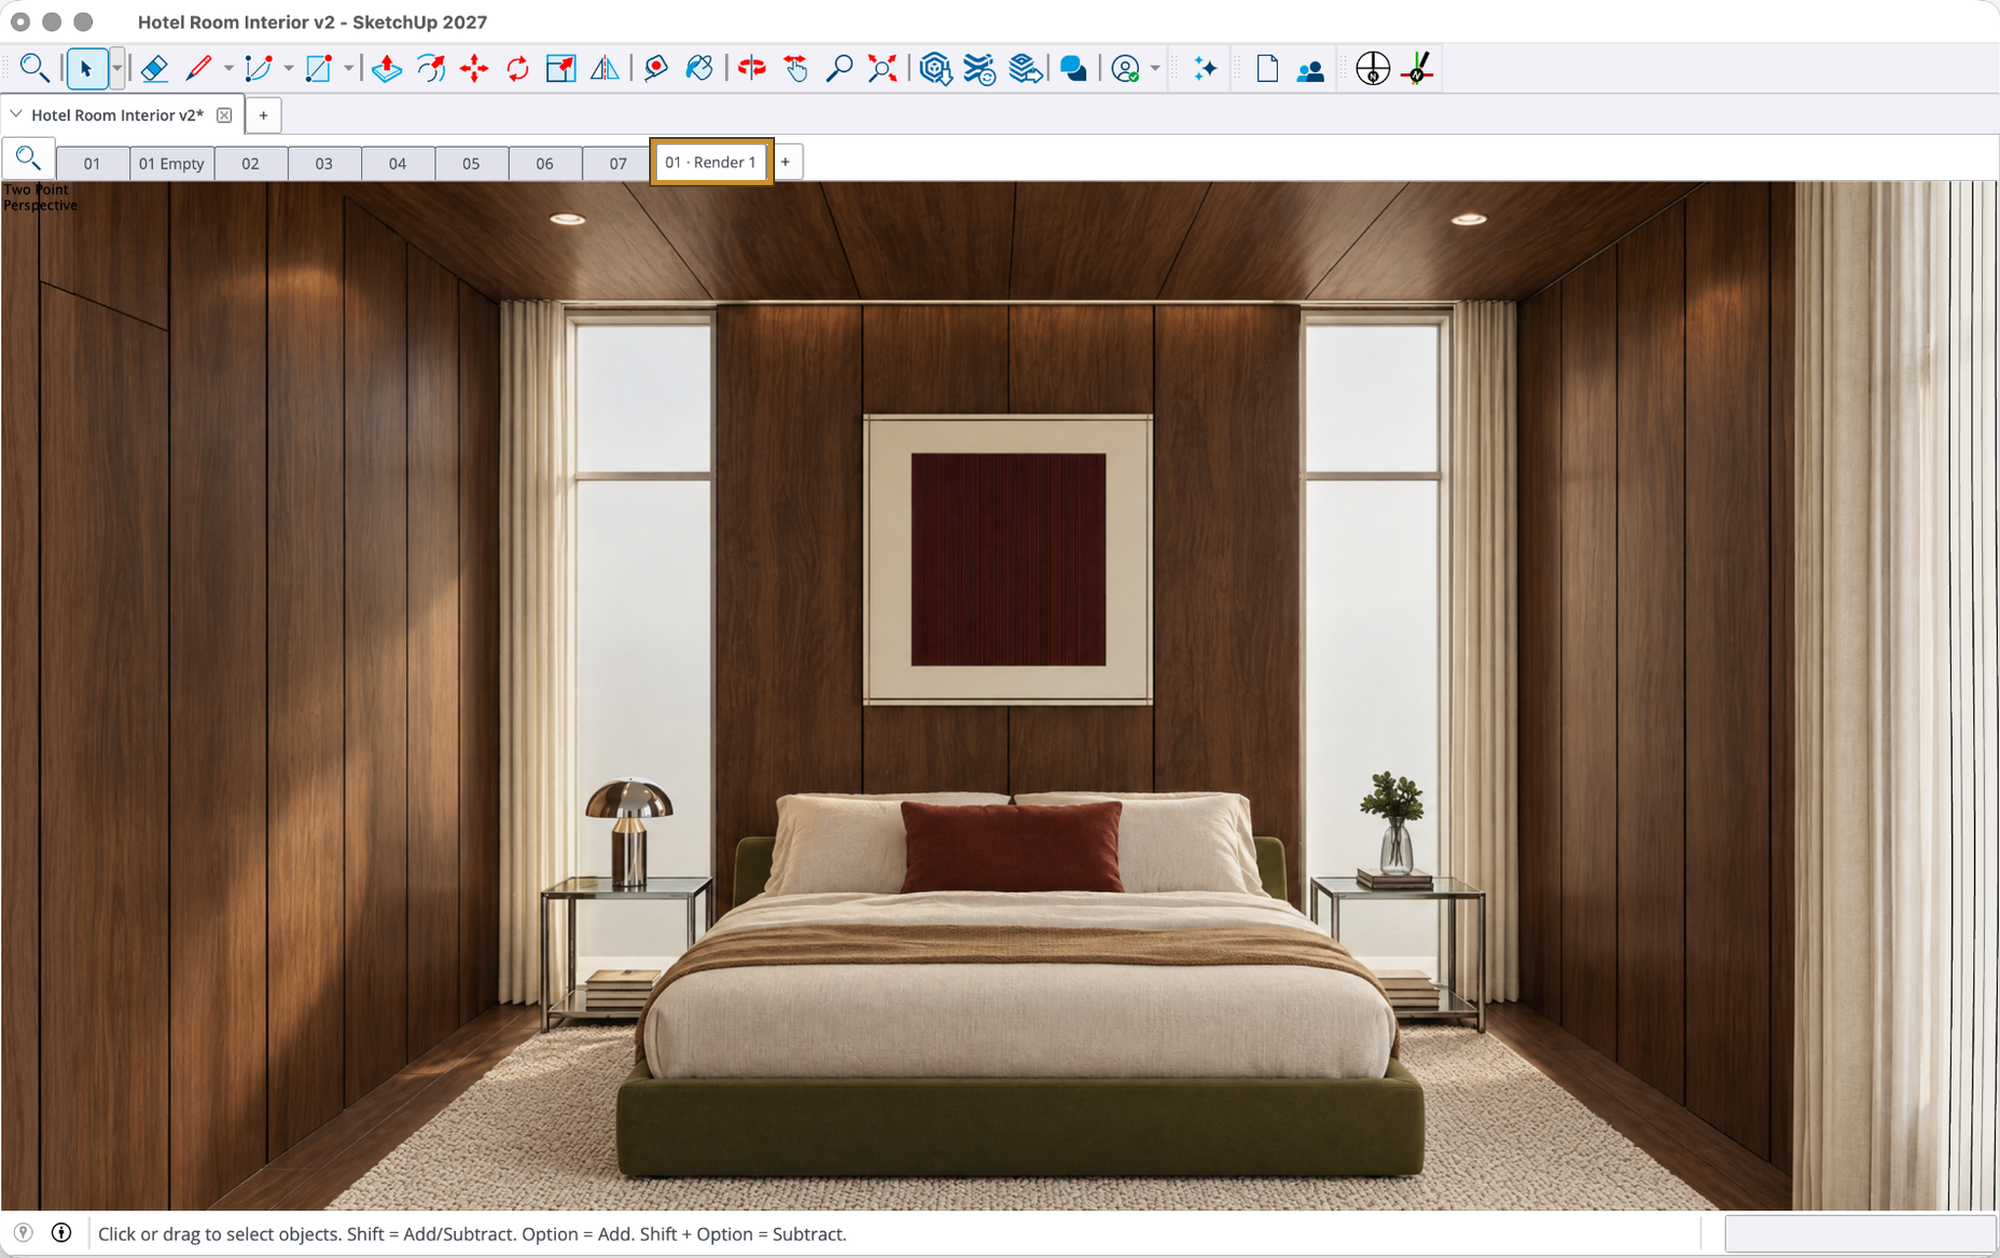
Click Save all to SketchUp to bring the rendered images back into your model. The extension adds scenes with the renders as watermark overlays at the same camera positions, so you can switch between model views and renders in SketchUp.
To download the image instead, use Download. Renders are also saved in your FORMAS account, so you can reopen them in Freeform Studio later.
To render another angle, move the camera and repeat from step 02, or save it as a scene and render several at once with Select scenes.
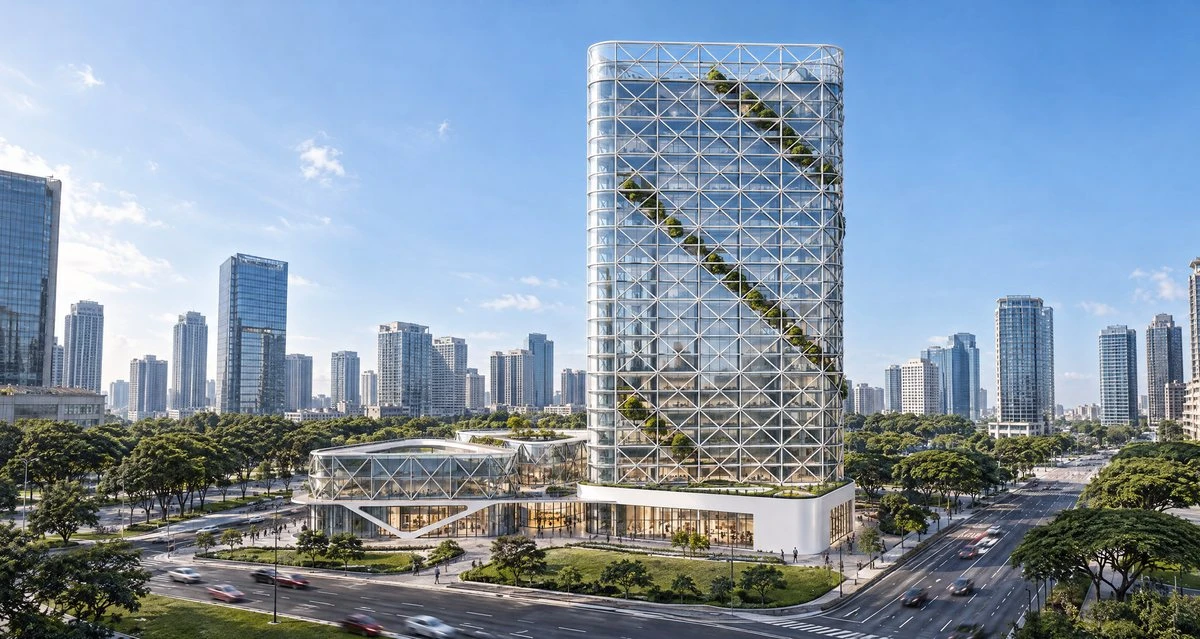
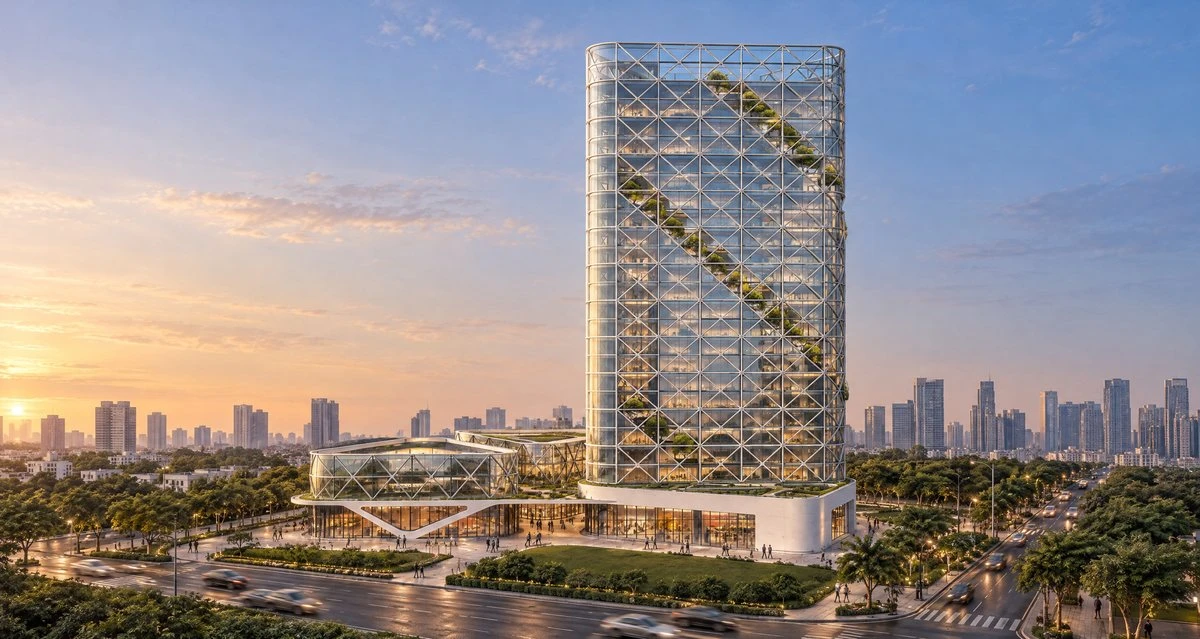
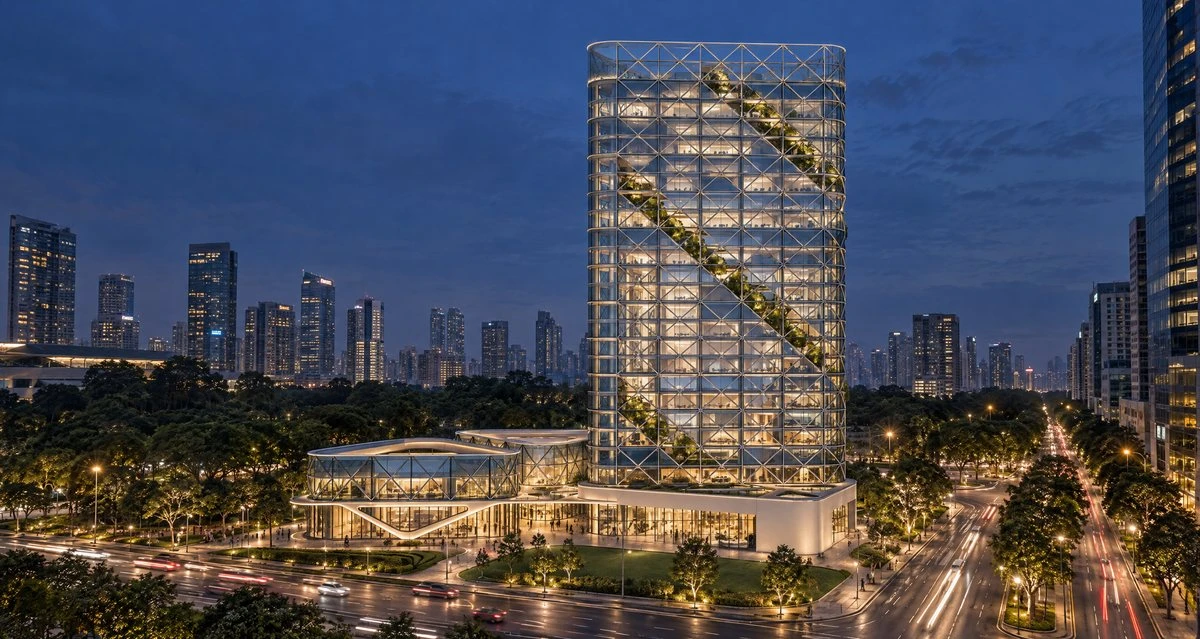
Explore exterior lighting
Use the same process for an exterior view. Keep the model and camera fixed, then change the lighting instructions to compare daylight, golden hour and night.
07 — Workflow at a glance
Read next
- How to turn a 3D model screenshot into a realistic render — the same workflow from Freeform Studio, for views exported from Rhino, Revit or other tools
- How to turn one architectural image into a short video — turn the final render into a 10-second film
- FORMAS for SketchUp on the Extension Warehouse — install the extension
- How to turn a furniture image into a 3D model — create a reusable mesh asset from a reference image
- Apps: How to render 3D model screenshots — use the standalone screenshot-rendering workflow
- All How-to Guides — browse the full tutorial library
- Getting started with FORMAS.AI for Trimble Connect


